Overview
Importing data from Excel spreadsheets only works with manual data sources. To get your Excel data into Plecto, you need to prepare your Plecto environment and prepare and upload the spreadsheet.
Here's an overview of the steps:
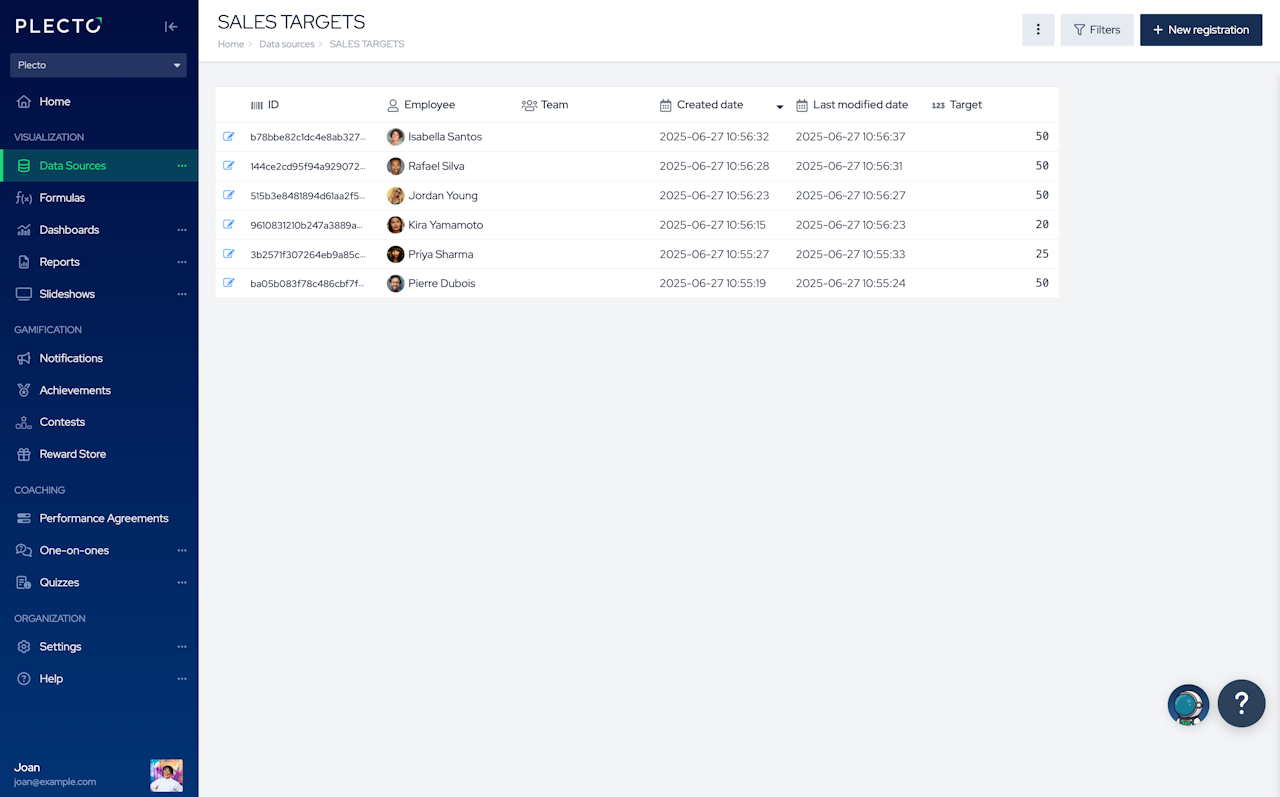
Create a manual data source and add more fields to match the columns in your spreadsheet. It will host all your uploaded data.
Download a data source template.
Prepare your spreadsheet.
Upload the spreadsheet to Plecto.

Step 1: Create a manual data source
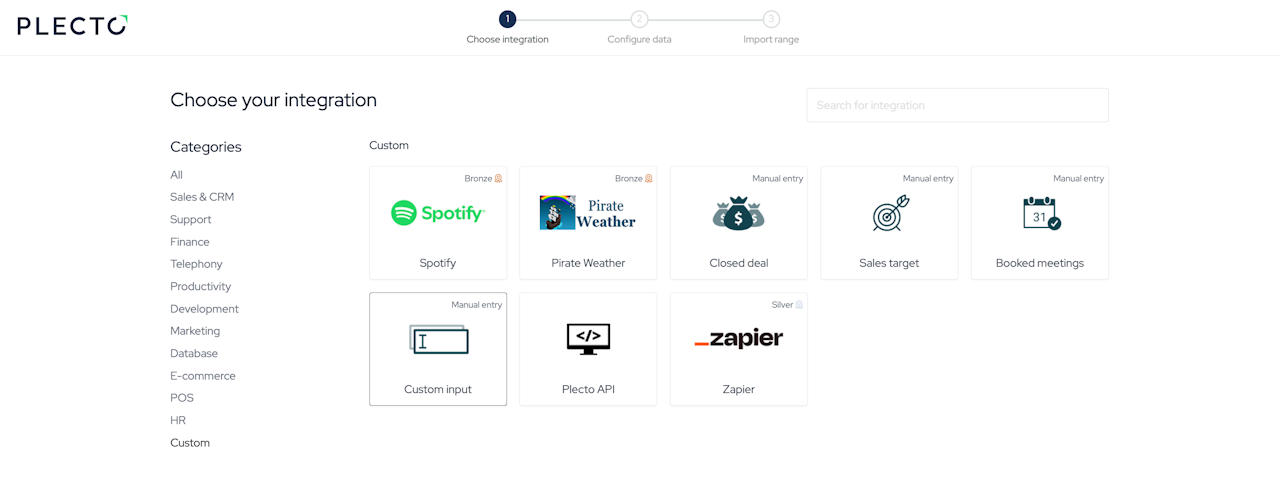
Go to Data sources > New data source.
Find the section Custom at the bottom of the page and select Custom input.
If you choose Custom input, give your data source a title.
(Optional) Add teams if you want this data source to be linked to a specific team(s).
Click Save. You will now be able to add more fields to the data source.
Click Add field to add a new column in the data source. Add a field name, select its type, enter a help text and default value if needed, or type a custom order value (fields with lower values shown on the left side).
Keep adding fields until you have the desired data source structure.
Note! Add all the fields you plan to import. If you upload a spreadsheet that contains more fields than your data source, Plecto won't recognize them and won't be able to import them.
Step 2: Download the data source template
Now that you have the data source ready, you can download its template in Excel format (.xlsx). The template will contain all the necessary column headers (data source fields).
It will be easier to prepare your spreadsheet if you have the template.
Go to Data sources and click Import from Excel in the top-right corner.
There is a dropdown at the top of the page. Select your manual data source, then click Download template.
Move to Step 3.

Step 3: Prepare your spreadsheet
Plecto needs to be able to recognize and sort the data from your spreadsheet, so make sure to prepare it accordingly.
Each row in the spreadsheet must represent a unique registration – one call, one deal, one transaction, and so on.
There are some fields that need to be part of the spreadsheet. Some of them are required to have data, and some need to be part of the spreadsheet, but optional to fill out:
Mandatory fields (must be filled out) | |
Each row must contain information about an employee. There are two combinations you can use. Provide ONE of the two in each row. | |
In a single row, provide Email + First name + Last name altogether. curtis@example.com, Curtis, Miller This option is useful if an employee already has a profile in Plecto. If the first and last names are different than in Plecto, we will update the employee names with the imported names from the spreadsheet. If they're not part of Plecto yet, we will send an invitation to the specified email. | In a single row, provide External User ID + External System Name + First name + Last name altogether. ab13yu5, Salesforce, Curtis, Miller This is a more technical option and it's similar to what we require if you send data via API. You can come up with your own External User ID and System Name (for example, Excel). The External User ID must be unique for each employee. |
Mandatory fields (must include in the sheet but optional to fill out) | |
Each row must have its own unique ID and a timestamp. If you don't provide this data, we'll auto-fill the fields once you upload the spreadsheet. | |
| |
Step 4: Upload your spreadsheet to Plecto
Go to Data sources > Import from Excel.
Select the manual data source in the dropdown at the top where you want to upload your spreadsheet's data.
In section 3 (Upload the file), click Choose File and select your spreadsheet.
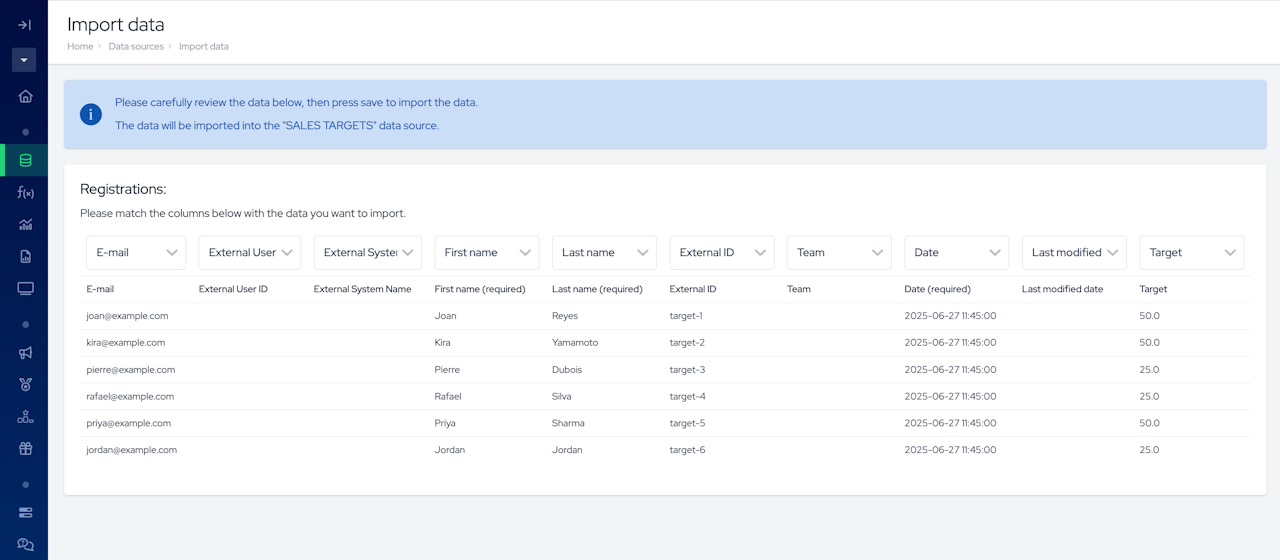
Click Preview in the bottom-right corner to see how Plecto will organize your data.
Double-check if all fields match your data source. If you see Do not import, it means that Plecto doesn't recognize a field OR that there's no such field in the data source. Click in the field to find your match.
Click Save to finish and import your data.
Good to know!
If the spreadsheet contains new emails, Plecto will fetch them and create new employee profiles in your account and send an invitation to the emails in question.
If the spreadsheet contains emails from users that are not part of your Plecto organization but are members in another organization, Plecto will not insert their data into the data source. To import data for these users, invite them to your organization.
In case any of the above-mentioned scenarios happen, Plecto will show you which emails are outstanding so you can decide on what actions to take.

