
What are relations?
Relations connect a registration from one data source to a registration from another by using registration ID.
Example
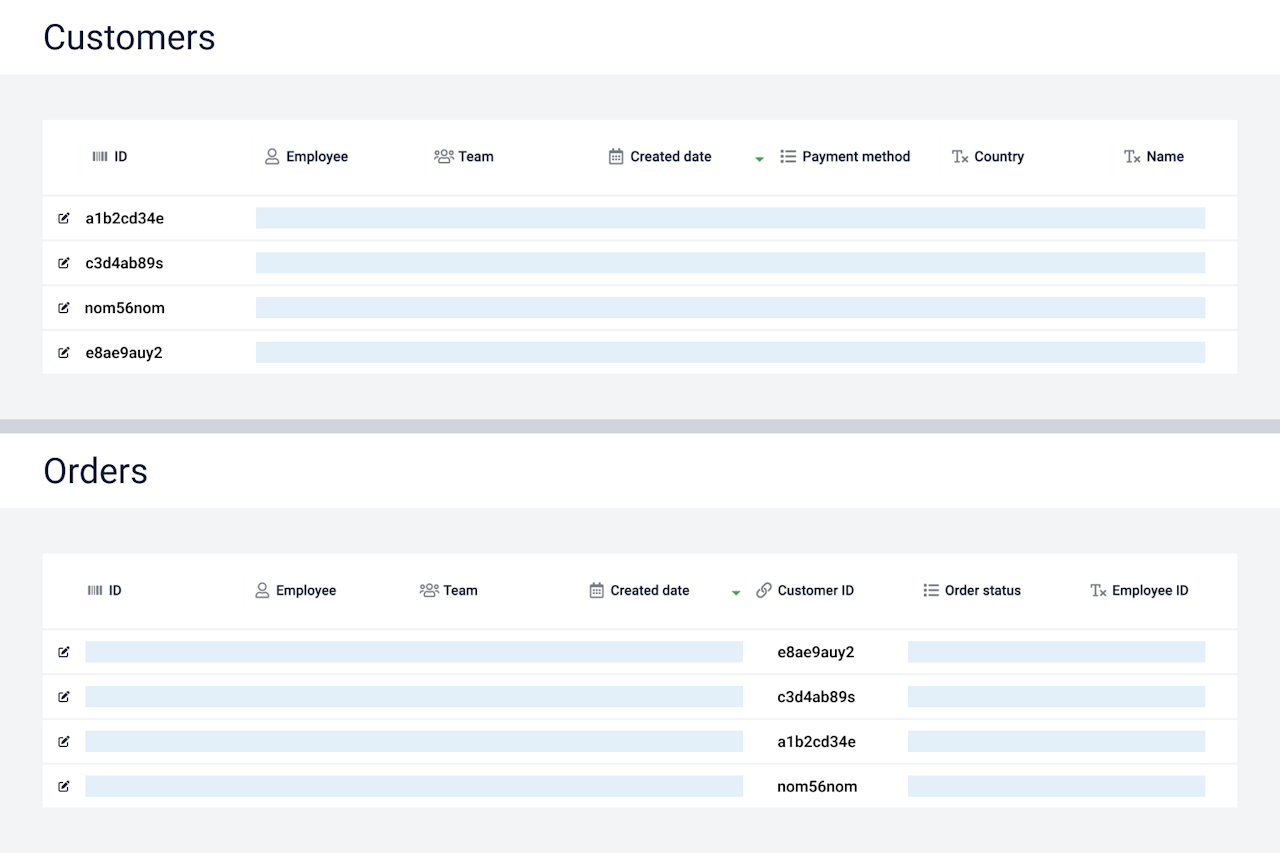
Data source Orders contains a field called Customer ID that links to a data source called Customers. So when you check information about a specific registration from Orders, you can also see the data about the customer.
🔗 You can manually configure relations between:
manual data sources,
link registrations from an integration, SQL, or API data source into a manual data source.
🔗 Plecto auto-generates relations in integrations that support this feature
Go to the integration guides to check specific technical details of an integration. You can find this information, including whether the integration supports relations, in the Available data section in the help guide.
Relations in formulas
You can filter data by relations in your formulas (you'll see a chain icon on the left of the field name):
To filter by a specific relation, click the field name and enter the relation value. It's usually presented in the form of an ID string.
To filter by a specific field from the related data source, click the chevron icon on the right and choose a data source field.
Relations on dashboard widgets
See data from one data source grouped by a field from another data source. You can group by relations on these dashboard widgets: table, line chart, area chart, column chart, and donut.
Example
Say you ship products across the world, and you want to know how many orders are sent to different countries.
Relations allows you to look at the total number of orders from the data source Orders, grouped by the country field from the data source Customers.
How to group by relations
In widget settings, select Group by > Custom field.
A new Group by field dropdown will appear. Select a field from the related data source, such as the Country field.
How to add relation fields to manual data sources
Go to Data sources and open manual data source settings.
Click Add field and fill in the following details:
Field type: Relation
Relation: Select the data source you want to relate. Plecto will link to that data source's registration IDs.
Field name: Choose a field name that represents the relation.
(Optional) Help text: If needed, add a short help text. It will appear next to the field name in the data source.
(Optional) Order: Reorganize your fields. Fields with lower order values will be placed more on the left.
(Optional) Allow empty field value: Enable this option if the field doesn't necessarily have to be filled out when adding new registrations.
Click Save to add the field.
Adding new registrations
Whenever you add new registrations, you'll be able to add a registration from the related data source by selecting its ID from the dropdown.
