How does a notification to MS Teams work?
Automate team updates and get notified in your Microsoft Teams feed whenever someone triggers a notification in Plecto.
Add custom text to the notification and include dynamic values to see the exact numbers that triggered the notification.
Good to know:
Only admins in Microsoft Teams can set up this notification in Plecto.
Currently, you can only send notifications to Standard channels (Shared and Private channels are not yet supported).
Step 1: Add Plecto to your App Catalog
If you want Plecto to send notifications to your MS Teams feed, you first need to upload a Plecto bot to your App Catalog in Microsoft Teams.
We're working on improving the setup, but until then, this is the solution we can provide.
Here's what to do:
Download the zip file here below (11KB). It contains the Plecto bot for Teams.
Open Teams and click Apps in the left-side menu.
Click Manage your apps > Upload an app and choose Upload an app to your org's app catalog.
Upload the file.
Choose a team and channel you want to add Plecto to. Plecto will be able to post messages to this channel.
Click Set up a bot to finish.
Proceed to Step 2 to add Microsoft Teams to your Plecto notification.

Step 2: Add MS Teams to your Plecto notification
If you're an admin in Microsoft Teams, here's how you can set up this notification in Plecto:
Go to Notifications and set up a new notification or open an existing one.
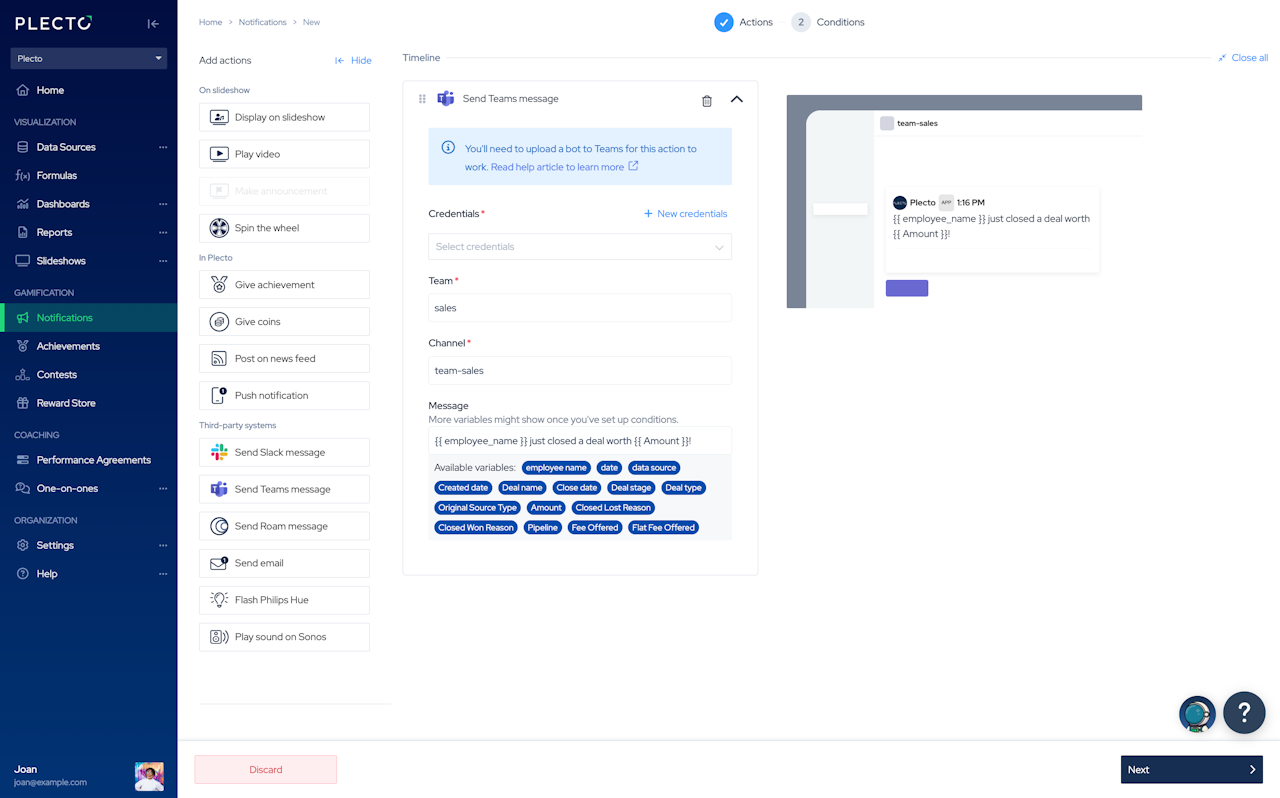
Add Send Teams message action to your timeline.
Select credentials. You have to be an admin in Teams. If you don't have credentials yet, click the plus icon ➕. You'll have to choose your region and log in to your MS Teams account and give Plecto permission to access your data.
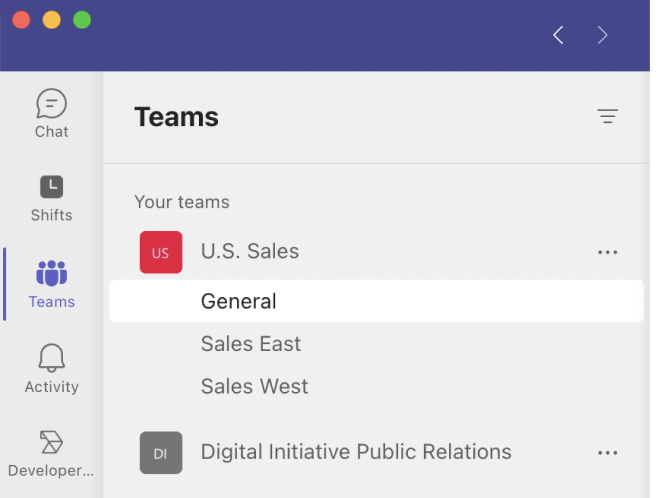
Add your team name, for example U.S. Sales. The team name is case-sensitive, so you should type it the same way as it appears in Teams.
Add the channel name, for example General. This is case-sensitive, too.
Add a message (optional). If your notification is based on data (configured in the Conditions step), you can add variables to the notification text. If added, you will see the details from the data source whenever you get the notification.
Click Next to set up the Conditions and create your notification.


